
In this guide you will learn Admin Tools
- Accessing Admin Tools
- Viewing Users
- Creating a New User (Step by Step Guide)
- Editing a User
- Editing Basic Information (Step by Step)
- Editing User Roles with Program Associations (Step by Step)
- Inactivating a User from a Program Association
IMPORTANT: A “User” is different from a “Client”. Users typically work at a provider and have access to VIVÉ to enter information.
Accessing Admin Tools
The core function of Administrative Tools is managing users. This is where users are viewed, created, and edited.
Step 1: Accessing the Admin Tools Menu
From Top Menu, click Admin Tools.

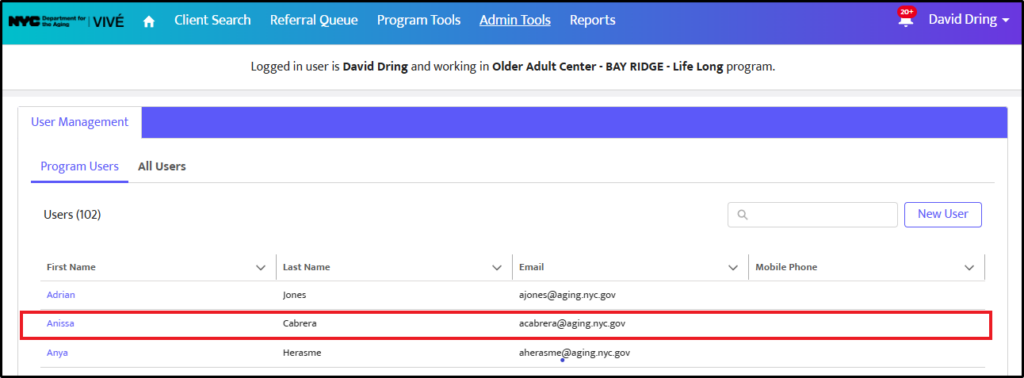
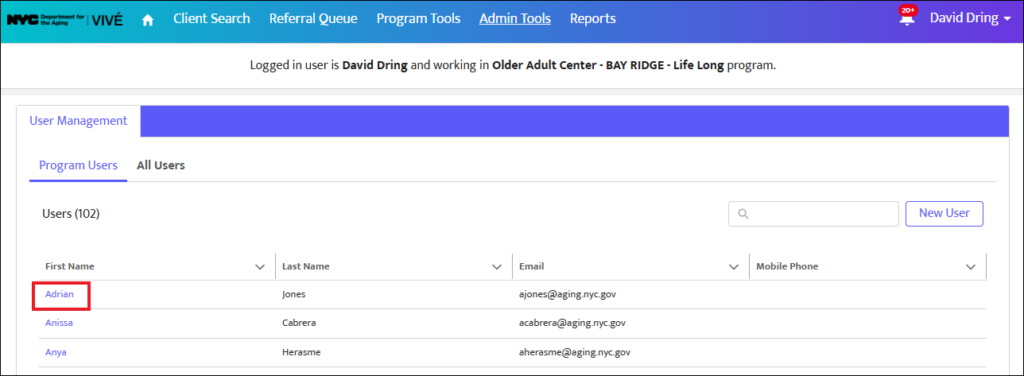
The User Management tab will be displayed by default. This page lists all the users within your program.
Viewing Users
There are two types of users within VIVÉ, which can be viewed by clicking either the Program Users or All Users links:
- Program Users: Users who are associated with your program.
- All Users: Users not in your program. This allows you to find a user that you would like to associate with your program.
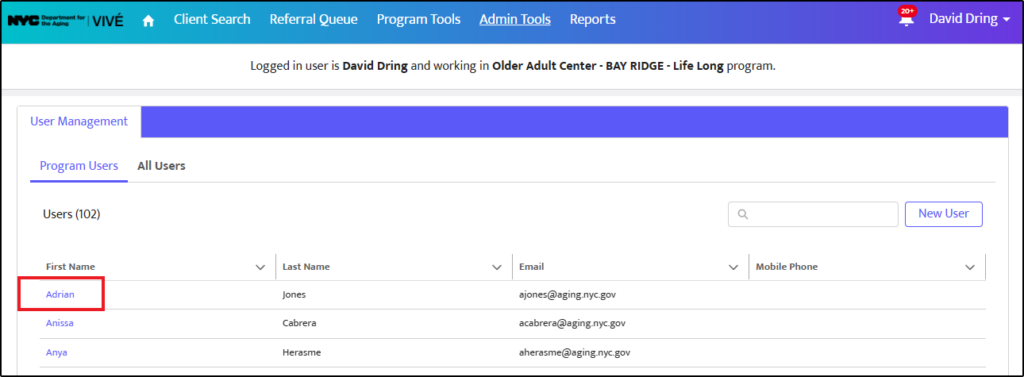
Searching for Users
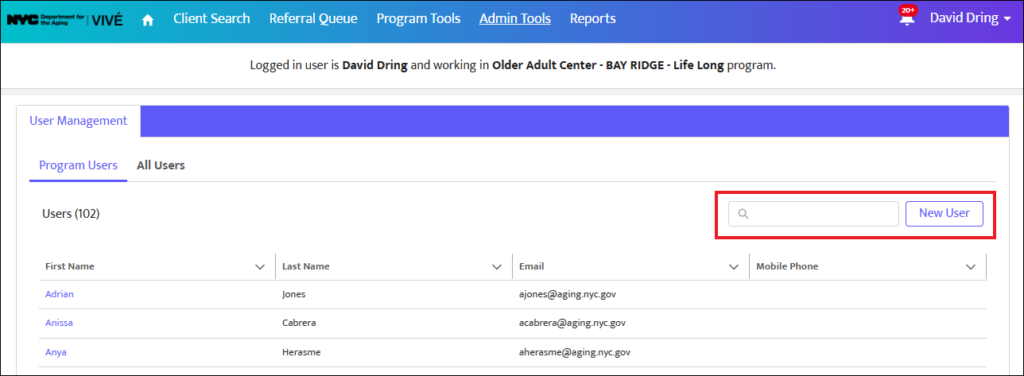
There is a search box on the User Management page. Enter either a part of or a complete user name to retrieve a list matching your search criteria.
Clicking on a user’s name link displays the user’s details, including what programs they are associated with.
Creating a New User (Step by Step Guide)
Below is a step-by-step explanation of how to create a new user in the User Management Tab.
Step 1: Click on Admin Tools
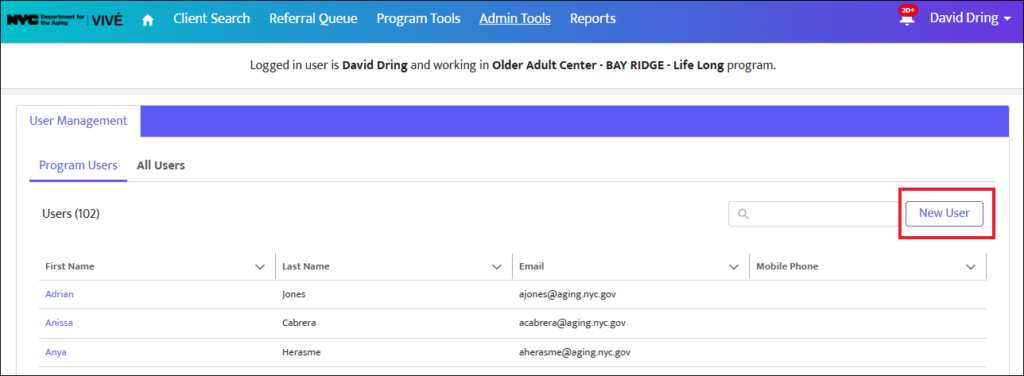
Step 2: Select New User
From the User Management list view, select the New User button.
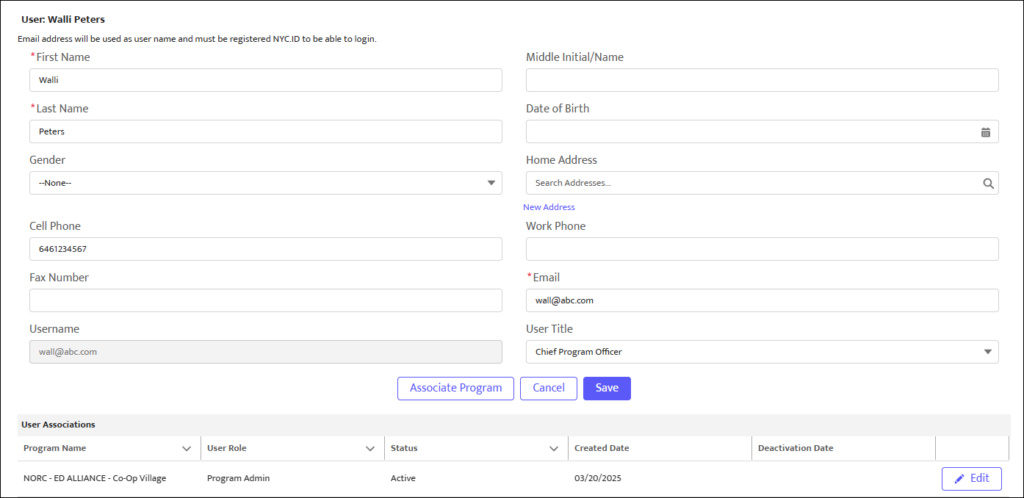
Step 3: Fill in Required Fields
From the New User pop-up, enter the required fields, such as Name, Phone #, Email, and User Role. The proceeding red asterisk (*) indicates that they are required.
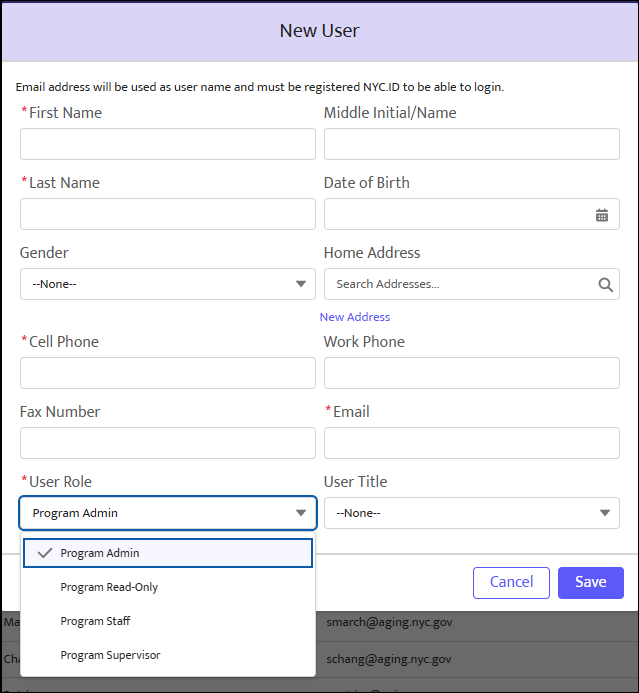
NOTE: The Email Address must be the same one associated with their NYC.ID. Email address will be used as a username and must be a registered NYC.ID to be able to login.
User Role Options:
- Program Admin: Has the ability to manage users of associated programs.
- Program Read-Only: Can view but not make any edits to select programs.
- Program Staff: The primary users of the system.
- Program Supervisor: The people responsible for approving and finalizing staff activities. For example, Program Supervisors approve, reject, or close a client’s enrollment into a program.
Step 4: Associate with Programs
Once the user’s information is saved, the user details page appears to associate the user with their program(s). There is no limit to the number of programs a user can be associated with.
Editing a User
There are two primary edits to a user’s details: basic information and user roles with program associations.
Editing Basic Information (Step by Step)
Step 1:
From the Top Menu, click on Admin Tools.
Step 2:
From the User Management list view, click the user’s name link.
Step 3:
From the user details page, edit information within any field. Select Save when finished.
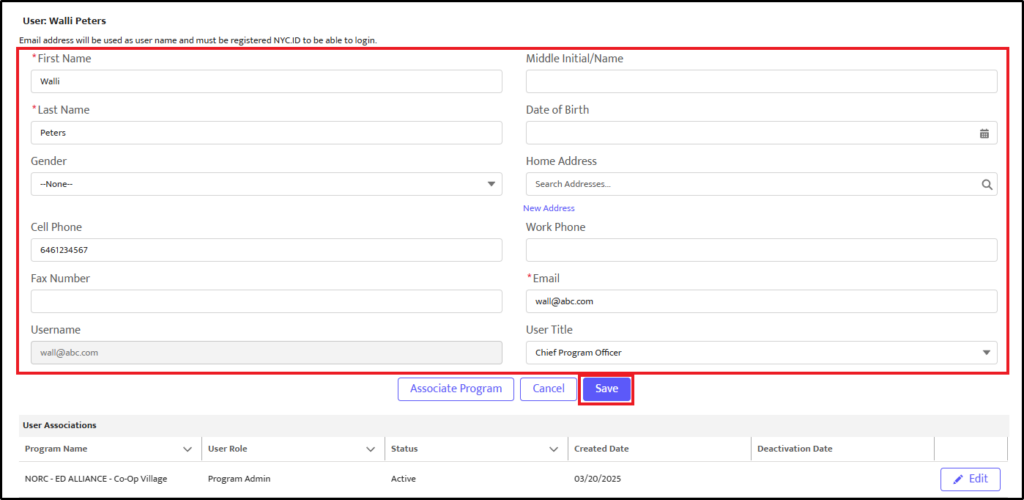
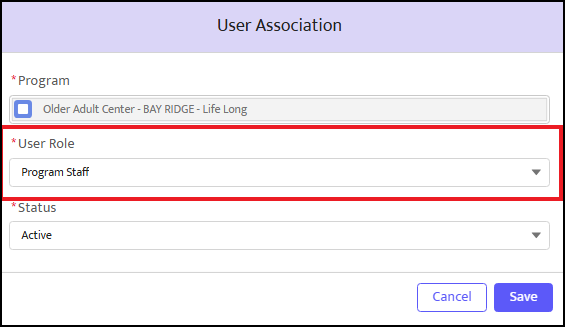
Editing User Roles with Program Associations (Step by Step)
A user can have different roles with their different program associations. For example, a user can be associated with a NORC as a Program Admin and with an OAC as Program Staff.
Step 1:
From the Top Menu, click on Admin Tools.
Step 2:
From the User Management list view, click the user’s name link.
Step 3:
From the user details page, select the Edit button to manage program association details.

Step 4:
Within the User Association pop-up, change either User Role or Status to establish the user’s role for that particular program. Select Save when finished.
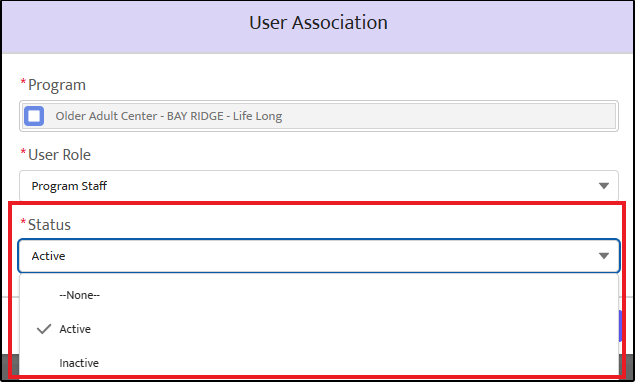
Inactivating a User from a Program Association
While users are never deleted from the system, they are inactivated from a program. In this way, they can be reactivated with another program later.
Step 1:
From the Top Menu, click on Admin Tools
Step 2:
From the User Management list view, click the user’s name link.
Step 3:
From the user details page, select the Edit button to manage program association details.
Step 4:
Select the Status drop-down to change the user’s status to ‘Inactive’. Then select Save.
Access Assistance with VIVÉ and the VIVÉ Knowledge Base
- VIVÉ Knowledge Base contains reference guides, short videos, and recorded trainings.
- If you have any questions, please contact the VIVÉ Application Support Center by submitting a ticket through the Ticketing Module under Program Tools.