
In this guide you will learn about Case Notes in VIVÉ, including:
- Case Notes Overview
- Entering Case Notes
- Editing Case Notes
- Finalizing Case Notes
- Printing Case Notes
- Linking Case Notes to Units
Case Notes Overview
Case Notes detail interactions with clients and record important client information. They provide a deeper understanding of the client’s needs, services provided, outstanding issues, and serve as a vehicle for supervision and oversight.
Tip: Be considerate and careful when writing Case Notes. They are legal documentation and may be reviewed during audits, assessments, and legal proceedings.
Entering Case Notes
Step 1: From the Top Menu, select Client Search, locate the client, and select the client’s name.
Step 2: From the Details Menu, select the Enrollments tab and then select the appropriate program enrollment.
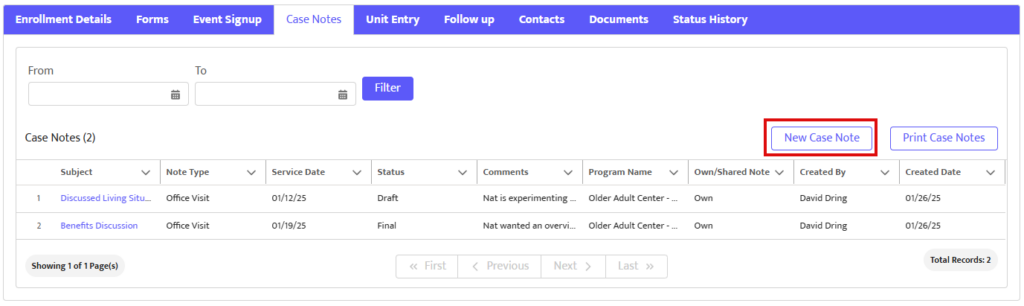
Step 3: From the Enrollment Details Menu, select the Case Notes section and then select New Case Note.
Step 4: A pop-up menu will appear to enter the notes. Keep in mind fields preceded by a red asterisk (*) are required. Follow these instructions when entering the fields:
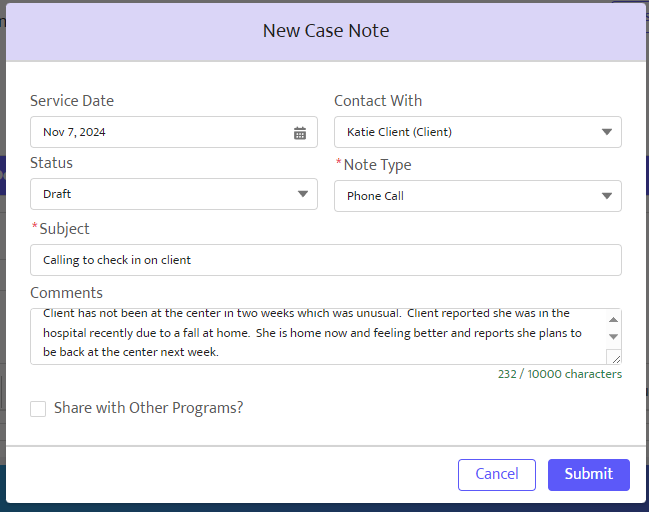
TIP: The system becomes inactive after 20 minutes of inactivity. Typing or clicking in the note area resets the timer.
Editing Case Notes
Step 1: Access the client’s enrollment record by following Steps 1–3 in the Entering Case Notes section.)
Step 2: Open the Case Notes section.
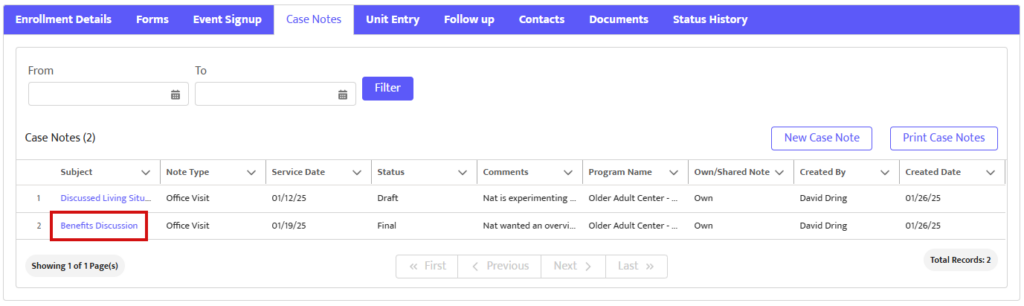
Step 3: Select the Subject link for the Case Note.
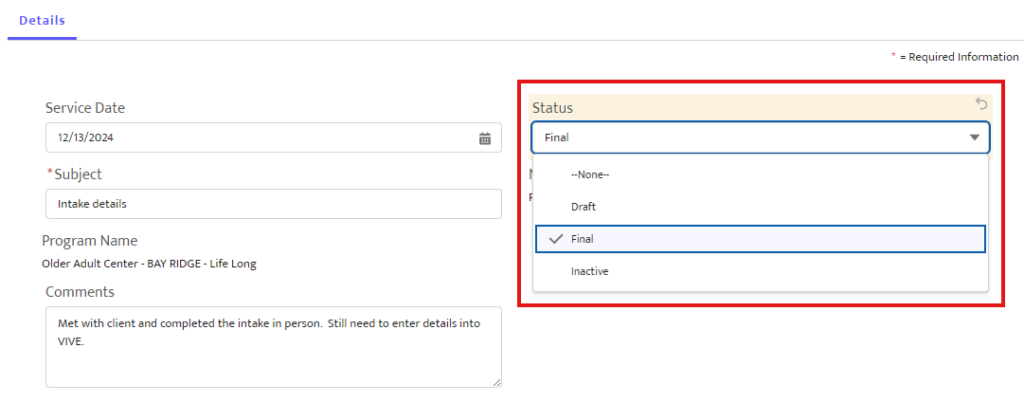
Step 4: Select the pencil icons to edit fields and select Save when finished.

TIP: Drag the lower-right corner of the comments field to expand the note window.
Finalizing Case Notes
To complete the note-taking process, Case Notes must be finalized. Review the Case Note details and change the Status to Final. Once finalized, the Case Note can no longer be edited.
Printing Case Notes
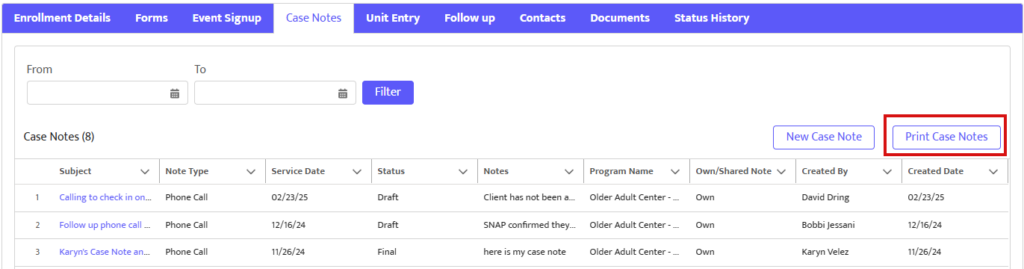
Step 1: There is a button to Print Case Notes from the list view of the Case Notes section. Click this button to initiate a print view of all the case notes for this client. The notes will be printed as a PDF file.
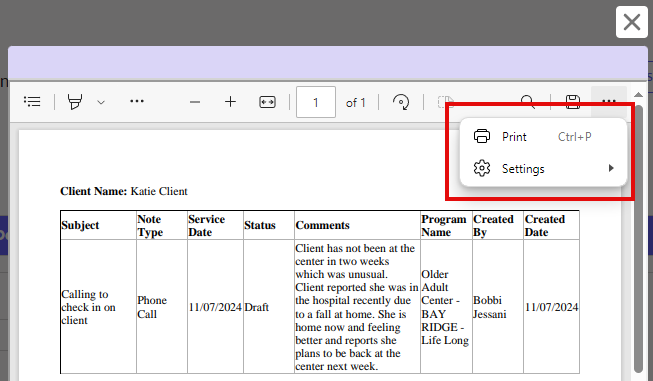
Step 2: A PDF window will open. Use your local printer settings to print the notes.
Linking Case Notes to Units
For programs that support it, finalized Case Notes can be linked to Unit Entries.
Step 1: Access Unit Entry from the Enrollment Details Menu.
Step 2: Select New to create a Unit Entry.

Step 3: At the bottom of the Unit Entry form, select the checkbox next to the appropriate finalized Case Note. Multiple Case Notes may be linked to a single Unit Entry.
